Showing posts with label seasonal. Show all posts

15 May 2012

Grandma Smith's Butterscotch Bars

For Mother's Day, my grandma and I baked these delightful little cookie bars! I've been eating these as long as I can remember. Always my favorite treat at any of our Smith side of the family gatherings. And now, I have the recipe!


1. In a large glass dish (or other microwaveable container) measure out half a cup butter or margarine and a bag of butterscotch chip morsels.


2. Place dish in microwave and heat for 30-45 seconds, then stir, then repeat until they are completely melted.


3. After about 2mins 45secs it looked like this. It was pretty much all melted, just the butter and morsels didn't completely combine.


4. Measure out 2 cups of graham cracker crumbs...I just found out you can actually buy the crackers already in crumb form! Excellent! Chop up 1 cup of walnut and add to graham cracker mixture.

5. Mix the morsels with butter and the graham crackers into a crumble, it doesn't have to be perfect because a little extra butterscotch in a bite is like striking gold for your taste buds!

6. In a greased baking dish (large) spread (HALF ) of the crumble into the bottom in an even layer. Make sure to get the corners and edges too because this will be the support for your bars.

7. For the center, you will need 1 can of condensed milk,  8oz bar of cream cheese, an egg, and 1 tsp of vanilla.

8. Place the step 7. ingredients into an electric mixing bowl. Turn on to low-medium.

9. The filling should be mixed until smooth. Little bits of cream cheese are ok because those will melt down once baked.

10. Pour cream cheese and milk filling on top of the crumble base and smooth out.

11. Carefully top with the other half of the crumble. Add this very gently so that you still have filling layer separate. Pop in the oven at 350 ° for 25-30mins. The top should brown just a little! Let cool.

12. There you have it! A delicious little bar!! :) Mmm...this is happiness in a bite! Ok..so maybe this ONE doesn't look too great. But I made these for my family camping trip with my grandma and left them at her house to cool. Then when she came up to picnic after we all camped, I transported a stash back with me on a paper plate, ate all but this ONE, realized I didn't have a pic of the bars and so here it is. 5 days later, and still REALLY yummy!

I love these old recipe cards! Good luck deciphering these babies!


♥ Grandma Smith, Me, Siena & Riley  ♥


26 December 2011

Gingerbread Recipe

First things first when making a gingerbread house... The Gingerbread!! I only remember my mom making this once as a kid, but after further investigation, she made it many years. Sorry I dont remember mom! But I really wanted to make this a tradition for my kids! Its so fun, and a great way to spend time as a family!


1. Lucky me, I got the help of my fireman Riley for this job! First get a BIG bowl! Youll need to shift 3 cups of flour. (Start preheating your oven to 350ºF)


2. Mix in the following ingredients: 1 tsp baking soda, ¾ tsp cinnamon, ¾ tsp ginger, ½ tsp allspice, ½ tsp cloves, ½ tsp salt, ¼ black pepper.


3. In a different beat together 1 stick of butter and ¼ cup of veg. shortening. (why does it seems I always use a yellow bowl for butter!?)


4.  Add ½ cup of brown sugar.


5. Blend until smooth. (Using an electric or hand mixer will be your best friend with all the mixing!)


6.  Ok, so here in Cancun (and according to the posts on google most of Mexico) its impossible to find molasses. So we have a little recipe to make something very similiar! This is a Piloncillo. You just need one.


7. Place it in 1 liter of boiling water and allow it to full disolve, then let it boil 2 minutes more and done!


8. Beat in 1 large egg and ⅔ cups of molasses (or your homemade Piloncillo!) into the butter and sugar mix.


9. Slowly add the dry mix, to the wet mix and stir. Hello cute fireman!


10. Keep mixing! You'll want a smooth, pretty much lump free batter.


11. Place in saran wrap and place in the fridge for at least a day. You can keep it longer if youre not going to make the cookies/house right away!


♥ Continue to next recipe to see how our Gingerbread House turned out!! ♥

Gingerbread House

Im  doing the house blog before the actual gingerbread recipe in case anyone is checking this by scrolling down. This is the fun part anyways!!


1. First we need to make the Royal Icing this is the glue that holds the house together (literally!). In a large bowl, you'll need 2 egg whites.


2. Next I added 2 tablespoon of vinegar (the recipe calls for lemon juice but I didn't have any I read online this works as a good substitute!)


3. Whisk the two ingredients together.


4. Slowly, add in 4 cups powdered sugar, keep whisking!

5. The icing should be smooth and kinda thick. Add more icing if super runny. Set aside.


6. To make the patterns for the walls, roof, and sides of my house, I used the examples at this site. I traced it over my monitor, then I cut them out!


7. Now get a large area to roll out our dough. I used my kitchen table, make sure to flour it well!


8. Here is the dough I previous made, refridgerated and unwrapped.


9. Roll. Roll. And roll some more! I was sick, about how much extra flour I had to keep adding just to be able to roll it without sticking! I wasnt doing this recipe to really eat it, just for the house and figurines, so keeping the taste didnt really matter in this case. (but hubby of course had some bits and said it wasnt bad!)


10. Roll it out till about ⅛ inch and then lay down your patterns and outline the edges with a knife.

(here you can the approx height for the dough)


11. Place a few peices on a greased baking sheet and bake for 10-15mins at 350°F.

12. Allow the peices to full cool before trying to assemble.


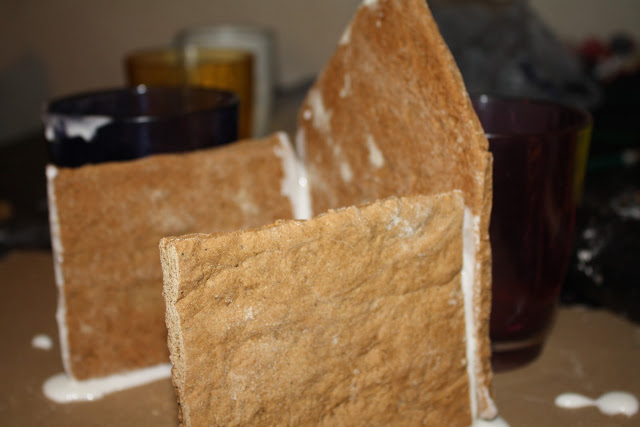
13. We used a cardboard box, but any firm, flat object will work. From there you start the building! We put the icing on the cardboard to ground the walls, and worked one wall to the next. You can see we used cups for support while it dried!


14. Here hubby is holding the peices together while I "glue"! I couldnt have him just sitting around eating all the candy not helping!


15. So here is the house, finally complete. I let it dry 5 hrs before trying to decorate it. (best if construct while the kids are at school so they wont be tempted to touch it, plus theres a fun activity waiting at home when they are out!)


Ta-Dah! I only bought three bags of candy: Gummie Bears, Marshmallows, and the Sugar Drops. The rest I pulled from the nooks and crannies of my kitchen and it turned out really cute! This is our Cancun Beach themed Gingerbread House! Where the Bears surf, we have "sandmen" instead of snowmen, and family lounges around in marshmallow bikinis!

♥ Merry Christmas! ♥


18 December 2011

Chocolate Cheesecake Christmas Bars

While I was searching online for some new Christmas cookie recipes I stumbled upon this recipe. I had surprisingly had most of the ingredients on hand, so I bookmarked and made it. Now of course, being in Mexico, I cant find all of the same ingredients...like Candy Canes (dont ask). My husband sneaks them constantly from the fridge, so they must be great!

1.  Mix together 1 Tablespoon of sugar and 1/2 a teaspoon of ground coffee beans. Preheat oven to 350 °F

2. Blend in a food processor 20 chocolate wafer cookies. 


3. Mix in with the wafers, sugar and coffee grinds, then add 3 tablespoons of butter and 1/4 teaspoon salt. Keep blending.


4. Place the contents in the processor into a lightly greased baking dish, make sure to press firmly, this will be the crust. Bake for 15mins....mean while we will make the filling:


5. To start the filling, you'll need 8oz of semi-sweet chocolate...

6. ...finely chopped :) Melt in micro-safe dish for about 2 mins until started to melt, stir, and microwave again about another 2 mins!


7. Measure out 2/3 cup of sugar.


8. (yes, I used the same spoon as the chocolate to scoop out the last of the sour cream :P) In a large bowl, add in sugar, 8oz cream cheese, and 1/2 cup sour cream...Nobody said this was a healthy cookie!


9. Mix the melted chocolate with the sugar-cream mixture. (now is when it starts smelling reaaaally good!)


10. Add in 2 large eggs and mix until smooth.


11. Pour the filling over the crust (which should be baked by now), place in oven and bake 25mins. The middle should giggle still but the side will be fluffed and baked.


12. For this glaze you need 4oz bittersweet chocolate (which I had to improvise..), 2 tablespoons unsalted butter,  1 teaspoon light or dark corn syrup, and 2 tablespoon sour cream. Mix together until creamy and smooth.


13. Pour glaze over the cake while its still warm.


14. Once it has started to cool and the glaze is firm, sprinkle over the top candy canes (or in my case, Tic Tacs dyed red and some left white, anything mint flavored will work here!).


15. Here you can see the 3 layers. I think the humidity made mine a little melty looking, but oh well. I found it was easier to cut them into squares by trimming two of the sides and then using a spatchula to scoop it out onto wax paper (this was actually my husbands idea...oh isnt he so smart!)

♥ Merry Christmas! ♥